
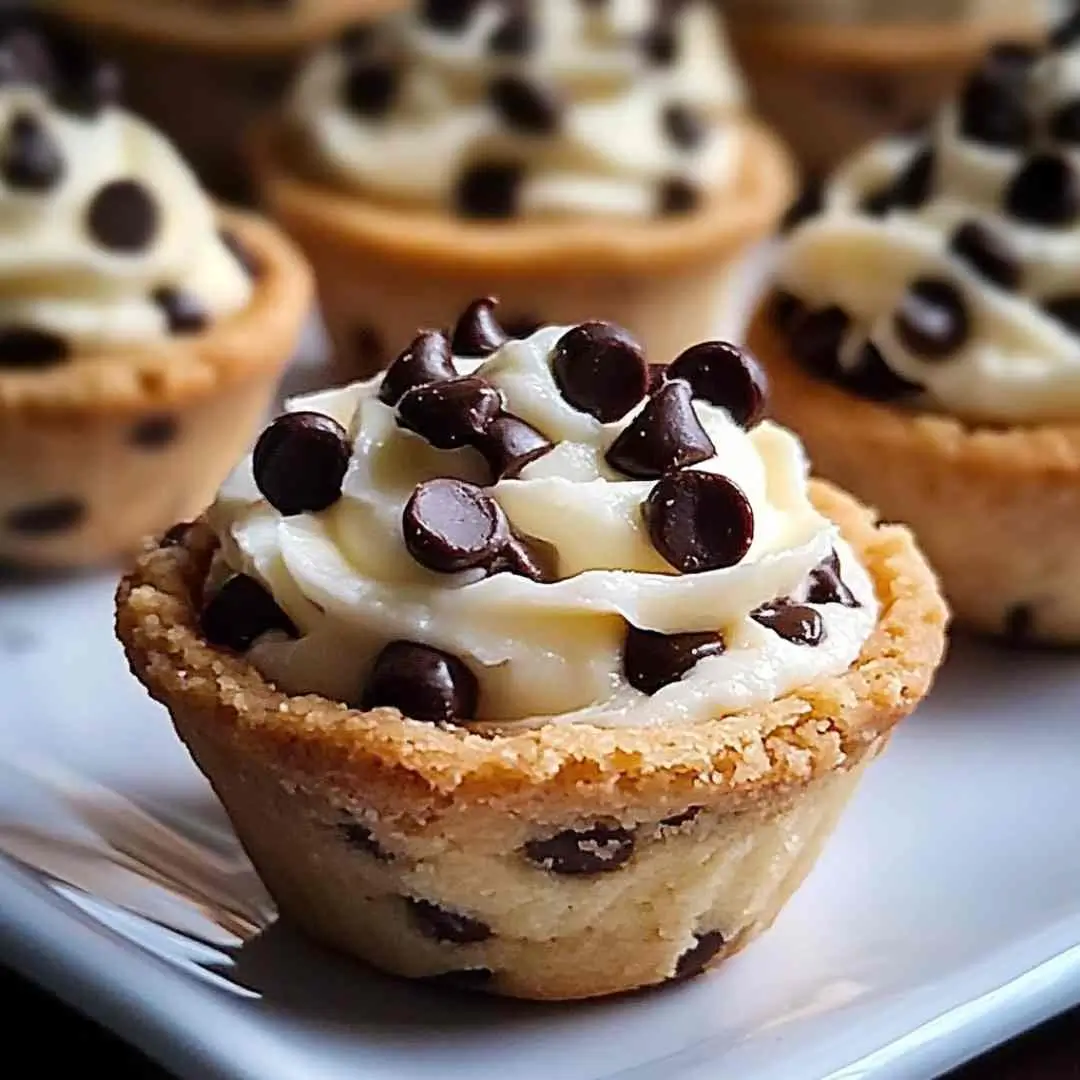
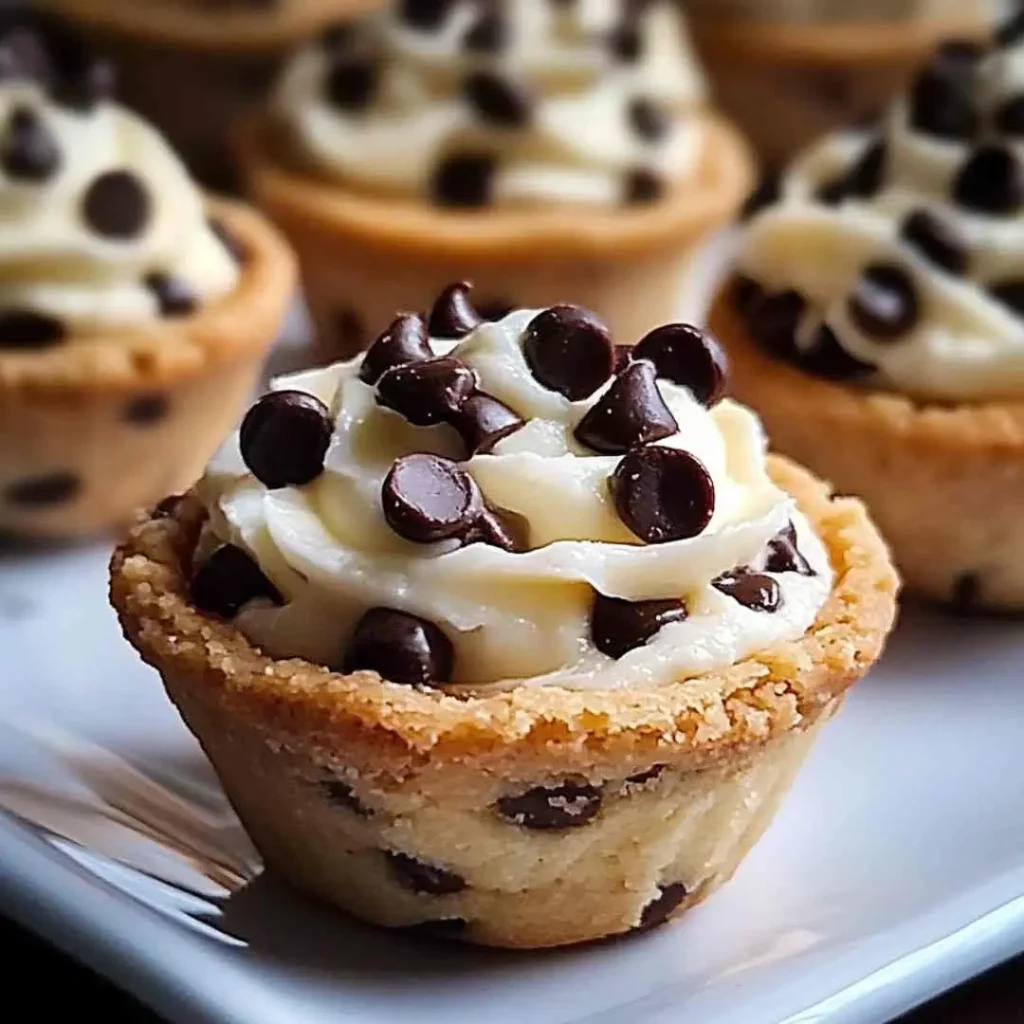
Cannoli Cookie Cups are my favorite shortcut to that dreamy, bakery-style indulgence—without the deep fryer. The first time I made them, it was a snowy afternoon, and the kids were bouncing off the walls.
I needed something fun, quick, and sweet to save the day. These golden little cups, filled with a creamy ricotta and mascarpone mix, turned out to be a total hit. They’re crunchy, creamy, and so easy to personalize with chocolate chips, pistachios, or orange zest.
They’ve become a go-to in our home for holidays, potlucks, or just those moments when you want something sweet and special without the extra work. And if you’ve never made them before, don’t worry—this recipe is simple, make-ahead friendly, and full of helpful tips.
Let’s walk through what you’ll need to whip up these cozy little Cannoli Cookie Cups and how to make them perfectly every time.
A Sweet Memory Rekindled
Cannoli has always held a special spot in our family—usually picked up from our favorite Italian bakery during holidays. But turning them into cookie cups? Game changer. The kids love helping press the dough into muffin tins (a little messy, but always worth it), and the filling is a no-fuss dream: ricotta, mascarpone, a kiss of cinnamon, and of course, mini chocolate chips.
If you’ve ever wanted to bring a little bakery magic home, these Cannoli Cookie Cups are the way to go. They’re not just easy—they’re the kind of recipe that feels like a win, no matter how your day’s going.
Why Cannoli Cookie Cups?
Because they’re fun, fuss-free, and always hit the sweet spot. You get all the beloved cannoli flavor, but without needing to pipe shells or deep-fry anything. These are perfect for making ahead, freezing the cookie cups, and filling just before serving. And they’re endlessly adaptable—try adding orange zest, swapping in chopped pistachios, or even mixing in a splash of almond extract for a new twist.
Whether it’s your first time baking or your fiftieth, Cannoli Cookie Cups are the kind of treat that feels like home. Sweet, simple, and a little nostalgic—with just enough flair to impress.
Crafting the Perfect Cannoli Cookie Cups
There’s something extra satisfying about a dessert that looks fancy but comes together with pantry staples. That’s exactly what you get with Cannoli Cookie Cups—no complicated steps, just a straightforward, delicious treat. These little bites combine the familiar ease of cookie dough with the creamy delight of a classic cannoli filling. Let’s gather everything you need to make them shine.
Essential Ingredients
You’ll likely have most of these ingredients on hand, which makes this recipe perfect for last-minute dessert plans. Here’s what you’ll need:
For the cookie cups:
- 1/2 cup unsalted butter, softened
- 1/2 cup granulated sugar
- 1/4 cup brown sugar
- 1 large egg
- 1 tsp vanilla extract
- 1 1/2 cups all-purpose flour
- 1/2 tsp baking powder
- 1/4 tsp salt
For the cannoli filling:
- 1 cup ricotta cheese, well-drained
- 1/2 cup mascarpone cheese
- 1/2 cup powdered sugar
- 1/2 tsp vanilla extract
- 1/4 tsp cinnamon
- 1/4 cup mini chocolate chips
For garnish (optional but lovely):
- Powdered sugar
- Extra mini chocolate chips or chopped pistachios
Tip: If your ricotta is too wet, line a fine mesh strainer with cheesecloth and let it drain in the fridge for an hour or two. Dry ricotta makes all the difference!
Step-by-Step Preparation
1. Make the Cookie Cups
Start by preheating your oven to 350°F and greasing a mini muffin tin. In a large bowl, cream the softened butter with both sugars until light and fluffy. Add in the egg and vanilla, mixing until smooth.
In a separate bowl, whisk together the flour, baking powder, and salt. Gradually add this to the wet mixture, stirring until a soft dough forms.
Scoop the dough into 1-inch balls and press each into the muffin tin to form a little well. Bake for 10–12 minutes, or until golden. Right after baking, gently press down the centers again using the back of a spoon to keep the cup shape. Let cool completely in the tin before removing.
2. Prepare the Filling
In a medium bowl, stir together the drained ricotta, mascarpone, powdered sugar, vanilla, and cinnamon until smooth. Fold in the mini chocolate chips. Chill for 30 minutes to let it set.
3. Assemble the Cookie Cups
Once your cookie cups are cool, pipe or spoon the filling into each one. A piping bag makes it look extra cute, but don’t stress—these taste just as good with a spoon swirl. Dust with powdered sugar and top with your favorite garnish.
That’s it! Next, we’ll talk about how to tweak these Cannoli Cookie Cups to suit your style, whether you want to go citrusy, nutty, or gluten-free.
Personalizing Your Cannoli Cookie Cups
One of my favorite things about Cannoli Cookie Cups—besides how fast they disappear—is how easy they are to make your own. Whether you’re a chocolate lover, a nut fanatic, or just someone who enjoys experimenting in the kitchen, these little treats are a great canvas for creativity. Even my kids like to “invent” their own versions, and let’s just say… sprinkles happen.
Flavor Enhancements
The basic filling is already delicious, but you can easily dress it up to match your mood—or your pantry. Try adding:
-
Fresh orange zest for that classic Sicilian vibe.
-
Almond extract instead of vanilla for a deeper, nuttier flavor.
-
Crushed biscotti or wafer cookies stirred into the filling for crunch.
-
Chopped dried fruit like cherries or apricots for a little chew and sweetness.
And if you’re feeling extra fancy, dip the tops of the cookie cups in melted dark chocolate before filling them. Let them harden in the fridge for a bakery-style touch.
For more inspiration, I like to look at my Italian dessert section or cookie variations on the blog—you’ll find all kinds of playful twists that could work beautifully here.
Dietary Adjustments
Need to tweak the recipe to fit dietary needs? No problem. These Cannoli Cookie Cups are surprisingly flexible:
-
Gluten-free: Swap the all-purpose flour for a 1:1 gluten-free baking flour. The texture stays nice and crisp.
-
Lower sugar: Use less powdered sugar in the filling or swap in a sugar-free substitute like monk fruit sweetener.
-
Nut-free: Just skip the pistachio garnish or replace it with crushed graham crackers, mini marshmallows, or extra chocolate chips.
I’ve also had success making these dairy-free using vegan butter and dairy-free cream cheese (instead of mascarpone) with tofu-based ricotta. It’s a little more effort, but it still hits the spot when you need that creamy fix.
Enjoying and Preserving Your Treats
Once your Cannoli Cookie Cups are filled and topped, the only thing left to do is enjoy them. But let’s talk about how to serve them with a little flair—and how to keep them fresh if you’re lucky enough to have leftovers.
Presentation Ideas
Cannoli Cookie Cups are already adorable, but a few thoughtful touches can turn them into a total showstopper at any event. Here are some fun ways to serve them:
-
On a tiered dessert tray with dusted powdered sugar and mint leaves for color.
-
Grouped by toppings—chocolate chips on one side, pistachios on the other, maybe even a sprinkle of edible glitter for birthday parties.
-
Chilled on a platter, with espresso or coffee on the side for grown-up gatherings.
They also make wonderful edible gifts. Just pop them into mini cupcake liners, tuck into a bakery box, and you’ve got a homemade gift that’ll earn you serious points.
And if you’re planning a dessert buffet or party table, these Cannoli Cookie Cups pair beautifully with other bite-sized sweets. My lemon sugar cookie bars and no-bake chocolate oat clusters are great companions.
Storage Recommendations
Here’s how to keep your Cannoli Cookie Cups tasting fresh and fabulous:
-
Unfilled cookie cups: Store in an airtight container at room temperature for up to 5 days. They also freeze well—just thaw before filling.
-
Filled cookie cups: Store in the refrigerator in a covered container. Best eaten within 2 days.
-
Filling only: The cannoli filling can be made up to 3 days in advance and kept in the fridge. Give it a good stir before piping.
Pro tip: Don’t fill the cups too far ahead of time if you want that perfect crunch. The longer they sit filled, the softer the cookie base becomes.
Cannoli Cookie Cups FAQs
Can I use only ricotta cheese in the filling?
Yes! If you don’t have mascarpone on hand, just stick with well-drained ricotta. It’ll be slightly less creamy, but still delicious. I’ve done it plenty of times when I was out of mascarpone—it’s all about making do with what’s in the fridge.
How long do Cannoli Cookie Cups last once filled?
They’re best within 1–2 days of filling. Keep them in an airtight container in the fridge. The longer they sit, the softer the cookie base becomes. For the best texture, I recommend filling them the same day you plan to serve.
Can I freeze Cannoli Cookie Cups?
You can freeze the unfilled cookie shells for up to a month. Just let them cool completely, then store in a freezer-safe bag or container. Thaw at room temperature before adding the filling. I don’t recommend freezing them once they’re filled—dairy-based fillings don’t always thaw with the best texture.
What are some nut-free topping ideas?
Skip the pistachios and try mini chocolate chips, sprinkles, crushed graham crackers, or even toasted coconut. One of my kids once topped theirs with crushed pretzels—and it worked!
Can I make these gluten-free?
Absolutely. A 1:1 gluten-free baking flour swap works great in the cookie base. Just be sure your flour includes a binder like xanthan gum for the best structure.
Final Thoughts
Cannoli Cookie Cups bring together everything I love about baking—comfort, creativity, and those sweet little moments that make life feel special. They’re a charming twist on a classic dessert, easy enough for a weeknight treat but fancy enough for your holiday spread. Whether you stick with the traditional filling or try something totally you, these little cups are made to be shared and enjoyed.
I hope you give these Cannoli Cookie Cups a try in your kitchen soon. And when you do, don’t be surprised if they disappear faster than you can say “save me one!” From my Midwest kitchen to yours—happy baking, friend.
Print
Cannoli Cookie Cups: A Simple, Creamy Dessert Everyone Will Love
- Total Time: 32 minutes
- Yield: 24 cups 1x
- Diet: Vegetarian
Description
Cannoli Cookie Cups are a cozy, creamy dessert blending crispy cookie shells with a luscious ricotta filling. Easy to make and fun to customize—perfect for parties or everyday treats.
Ingredients
1/2 cup unsalted butter, softened
1/2 cup granulated sugar
1/4 cup brown sugar
1 large egg
1 tsp vanilla extract
1 1/2 cups all-purpose flour
1/2 tsp baking powder
1/4 tsp salt
1 cup ricotta cheese, well-drained
1/2 cup mascarpone cheese
1/2 cup powdered sugar
1/2 tsp vanilla extract
1/4 tsp cinnamon
1/4 cup mini chocolate chips
Powdered sugar for garnish
Chopped pistachios or extra chips (optional)
Instructions
1. Preheat oven to 350°F and grease a mini muffin tin.
2. Cream butter with granulated and brown sugars until light.
3. Add egg and vanilla; mix well.
4. Combine flour, baking powder, and salt. Mix into wet ingredients.
5. Roll dough into 1-inch balls; press into muffin tin to form cups.
6. Bake for 10–12 minutes until golden. Press centers down again and cool.
7. Mix ricotta, mascarpone, powdered sugar, vanilla, and cinnamon until smooth.
8. Fold in mini chocolate chips. Chill filling for 30 minutes.
9. Fill cookie cups using a spoon or piping bag.
10. Garnish with powdered sugar and toppings. Serve chilled.
Notes
Make cookie cups ahead and store unfilled for freshness.
Use well-drained ricotta to avoid soggy texture.
Customize the filling with orange zest or almond extract.
- Prep Time: 20 minutes
- Cook Time: 12 minutes
- Category: Desserts
- Method: Baking
- Cuisine: Italian-American
Nutrition
- Serving Size: 1 cookie cup
- Calories: 125
- Sugar: 9g
- Sodium: 40mg
- Fat: 7g
- Saturated Fat: 4g
- Unsaturated Fat: 2g
- Trans Fat: 0g
- Carbohydrates: 14g
- Fiber: 0.5g
- Protein: 2g
- Cholesterol: 20mg
Keywords: Cannoli Cookie Cups, cannoli, cookies, ricotta desserts