
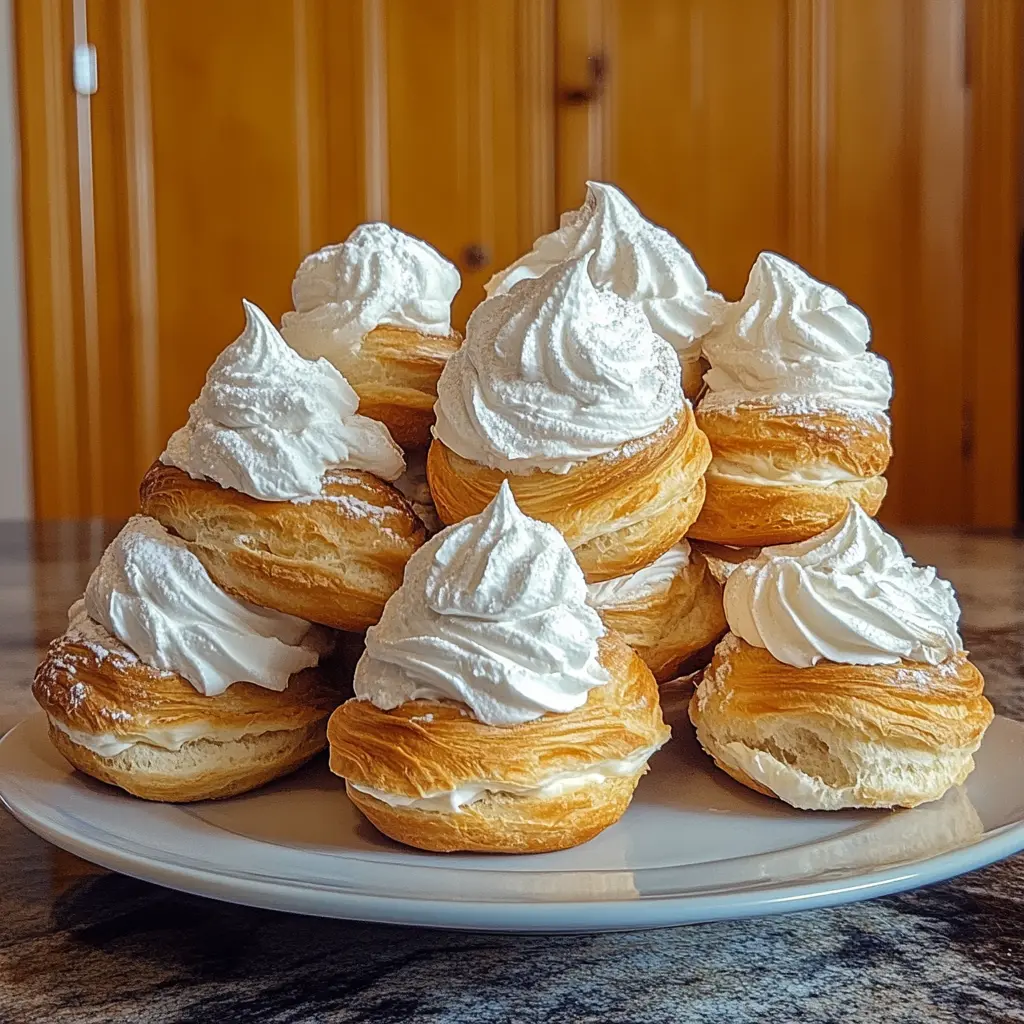
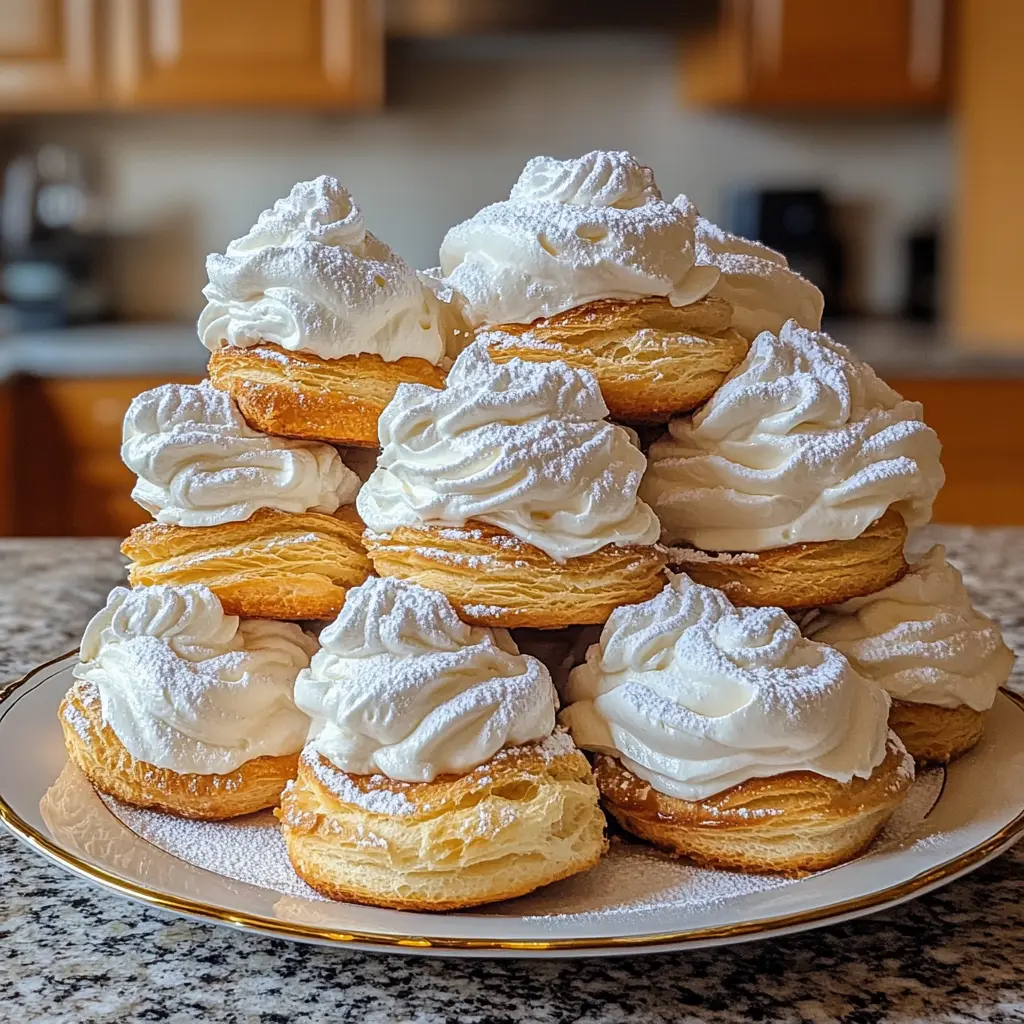
Cream puffs recipe lovers, this one’s for you. Light, airy shells filled with creamy, decadent pastry cream—this classic French dessert is easier to make than you think, and the results are bakery-worthy.
Whether you’re new to baking or a weekend kitchen warrior, this guide will walk you through each step to help you master the ultimate cream puff at home.
In this article, you’ll learn exactly how to make the perfect choux pastry, whip up a rich vanilla custard, and assemble everything like a pro. We’ll also cover expert tips, storage methods, and how to avoid common cream puff fails. Along the way,
What Are Cream Puffs?
A Classic Dessert with French Origins
Cream puffs, also known as profiteroles, are a traditional French dessert made from a light, airy dough called pâte à choux (choux pastry). This dough puffs up in the oven, creating a hollow center that’s perfect for filling.
Unlike many other pastries, there’s no yeast or baking powder involved—just steam doing all the work.
The earliest versions of the cream puff date back to the 16th century in France, and they’ve only gotten more popular over time. Today, you’ll find them in bakeries, dessert shops, and home kitchens across the world.
They’re simple in ingredients but elegant in presentation—a perfect balance of sophistication and ease.
Choux pastry is one of the few doughs that’s cooked before baking. It’s used not just in cream puffs but also in éclairs, gougères (savory cheese puffs), and even churros in some variations.
Choux Pastry and Sweet Cream: A Match Made in Heaven
What makes cream puffs truly irresistible is their contrast: crisp, golden exteriors giving way to cool, creamy centers. While many variations exist—ice cream-filled profiteroles, whipped cream versions, and even chocolate-dipped tops—the classic pastry cream-filled cream puff remains the gold standard.
The choux shell itself is neutral in flavor, which makes it the perfect vessel for sweet, rich fillings. When baked correctly, the pastry is airy and hollow, with a slightly crisp outer shell that softens once filled with cream. That means getting the baking process right is crucial—and don’t worry, we’ll break that all down in the next parts.
Choux may seem fancy, but it’s surprisingly easy to make once you understand the method. The secret lies in timing, heat, and just the right mix of eggs, butter, and flour. You’ll see exactly how to master it in Part 4.
So if you’ve ever wondered what makes a cream puff puff—or how bakers achieve that dreamy custard center—you’re in the right place. This cream puffs recipe will leave you confident and ready to impress.
Cream Puffs Recipe That’s a Family Favorite
A Timeless Recipe Passed Down Generations
Cream puffs recipe lovers often agree—there’s nothing quite like a homemade version crafted with care. This isn’t just any dessert in our family. It’s a tradition. Every holiday, celebration, or Sunday gathering included these airy, golden puffs filled with rich cream and dusted with powdered sugar.
Passed down from Mom and perfected through years of family baking, this version is simple enough for beginners and reliable enough for pros.
What makes it so special? It’s not about fancy ingredients or professional tools. The magic lies in getting the technique right, sticking to real ingredients, and following tried-and-true steps that guarantee puffed, crisp shells and silky, flavorful filling every time.
Every time we serve these, someone asks, “Where did you buy them?” And every time, we proudly say, “Mom’s kitchen.” That’s how legendary this cream puffs recipe has become.
The Secret Techniques That Make the Difference
What elevates this dessert from good to unforgettable? Let’s break it down.
-
Steam Power: Instead of using yeast or baking soda, choux dough uses moisture from butter, water, and eggs to create steam and puff up. That means measuring and mixing accurately is vital.
-
Drying the Dough: After mixing the flour into the boiling water and butter, the dough is cooked briefly to evaporate excess moisture. This helps achieve a firmer structure and better rise.
-
Egg Timing: Eggs are added one at a time, and each one must be fully incorporated before the next. This step gives the dough its glossy texture and flexibility, which is essential for good piping.
-
No Peeking Rule: One of the most important tricks? Don’t open the oven while baking. Let the puffs rise and brown without interrupting the steam process. Opening the door even once too early can cause deflation.
-
Cool and Dry: Once baked, they’re left in a turned-off oven with the door slightly open. This ensures the interior dries out, preventing sogginess when filled.
All these little details come together in this cream puffs recipe to produce consistent, bakery-quality results every single time. Whether you’re baking a dozen for a dinner party or making a batch just because—it’s a recipe that feels like home.
Ingredients You’ll Need for the Perfect Cream Puffs
Choux Pastry Essentials
A great cream puffs recipe begins with the foundation of all cream puffs—choux pastry. It’s a unique dough that puffs up in the oven, creating the light, hollow shells you’ll soon fill with rich cream. While it may sound fancy, choux pastry only needs a handful of pantry staples.
To make it, you’ll need one cup of water, which helps create the steam that causes the dough to rise. Add half a cup of unsalted butter for flavor and moisture. A pinch—about a quarter teaspoon—of salt enhances the taste without overpowering it. Then, one cup of all-purpose flour gives the pastry structure. Finally, four large eggs are added one by one, binding everything together and giving the dough its shine and elasticity.
It’s important to follow the order and timing of each ingredient carefully. Add the flour only after the water and butter are brought to a boil. Mix vigorously until the dough pulls away from the sides of the pan. This stage sets the tone for a well-structured puff. Letting the dough cool slightly before beating in the eggs ensures you won’t cook them prematurely.
If you measure carefully and follow the right technique, the result is light, crisp pastry that holds its shape and texture once baked. You don’t need yeast, baking soda, or baking powder—just steam power and precision.
Rich and Silky Pastry Cream Filling
The real joy of this cream puffs recipe comes when you bite into that soft pastry and find a cold, smooth filling inside. While some recipes take shortcuts with whipped cream or pudding, our version uses classic pastry cream for a richer, more satisfying flavor.
You’ll start with whole milk—two cups—for a creamy base. Granulated sugar, about half a cup, adds sweetness, while a quarter cup of cornstarch acts as a thickener. Don’t forget a dash of salt to round out the flavors.
You’ll also need four egg yolks, which provide both richness and that gorgeous yellow color. Vanilla extract, added after the mixture is cooked, gives the filling its classic dessert aroma. Finish it all off with two tablespoons of butter for a smooth, silky texture.
The key to making great pastry cream is temperature control. You’ll temper the eggs by slowly adding the hot milk mixture into them while whisking constantly. This prevents scrambling. Then you return the mix to the stove and whisk until it thickens to the perfect custard consistency.
Once it’s ready, remove from heat, stir in your vanilla and butter, and press a piece of plastic wrap directly onto the surface before chilling. This keeps the top from forming a skin and ensures a beautiful, spreadable texture.
With these two core components—light choux shells and creamy custard—you’re halfway to dessert perfection.
Step-by-Step Guide: Making Choux Pastry
Preparing the Dough Right
When it comes to a cream puffs recipe, the dough is everything. Choux pastry may sound intimidating, but it’s surprisingly simple if you follow the process carefully. The dough starts on the stovetop and finishes with a smooth, pipeable texture. This method is what gives cream puffs their signature hollow, puffed center.
Start by combining one cup of water, half a cup of unsalted butter, and a pinch of salt in a medium saucepan. Bring everything to a boil over medium heat. Once it’s bubbling, remove the pan from the heat and immediately add one cup of flour all at once. Stir vigorously with a wooden spoon. The mixture will quickly thicken and pull into a ball—this is exactly what you want.
Return the pan to low heat and keep stirring for about two more minutes. This step is crucial because it helps dry out the dough slightly, which gives you better puff and structure later during baking. Don’t skip it.
Transfer the dough to a mixing bowl and let it cool for a few minutes. You want it warm—not hot—before adding eggs to avoid scrambling them.
Next, crack in one egg at a time, beating well after each addition. At first, the dough might look like it’s separating, but keep mixing. It will eventually come together into a smooth, shiny dough that holds its shape when piped. You’re aiming for a texture that’s thick enough to pipe but soft enough to rise well in the oven.
If you’ve never made choux before, don’t worry. After your first batch, it’ll feel like second nature.
How to Get the Texture Perfect Every Time
Choux pastry success often comes down to texture—and getting it just right is easier when you know what to look for. The final dough should be smooth, shiny, and form a “V” shape when a spoon is lifted. Too stiff, and your puffs won’t rise. Too runny, and they’ll collapse.
Here are a few quick tips to keep you on track:
-
Watch the dough: After adding each egg, evaluate the consistency before moving on. The goal is elasticity—not liquid.
-
Use room temperature eggs: They blend more easily and help you control the dough’s consistency.
-
Avoid overmixing: Once the final egg is incorporated and the dough looks smooth and glossy, stop. Overmixing can break down the structure.
-
Spoon test: Lift a spoonful of dough and let it fall. It should slowly stretch and fall back into the bowl without breaking off too quickly.
Remember, this dough is the heart of any great cream puffs recipe. Once you master this step, the rest is a breeze.
Piping and Baking Your Cream Puffs
Proper Piping Techniques for Uniform Puffs
In any successful cream puffs recipe, how you shape the dough makes a huge difference. Once your choux pastry is smooth and glossy, it’s time to pipe it onto a baking sheet. The good news? You don’t need to be a pastry chef to get it right.
Grab a pastry bag fitted with a plain round tip. If you don’t have one, a resealable plastic bag with the corner snipped off works in a pinch. Spoon your dough into the bag and twist the top to seal it tightly—this gives you control and prevents overflow.
Pipe small mounds, about 1½ inches wide, onto a parchment-lined baking sheet. Leave around two inches of space between each puff, because they will expand in the oven. Aim to keep them uniform in size so they bake evenly.
If you notice peaks or little tips sticking up, dip your finger in water and gently press them down. This ensures a smooth top and helps avoid burning those points while baking.
Consistency in shape means consistency in baking, and that’s how you get a batch of cream puffs that look just as good as they taste.
Baking Tips to Ensure Puff and Structure
Now comes the most important part of the cream puffs recipe—baking. Preheat your oven to 400°F (200°C). Getting the temperature right is key because that initial blast of heat creates the steam needed for the dough to puff up.
Once the puffs are in, do not open the oven door. Seriously. It’s tempting to peek, but the sudden drop in temperature can cause your puffs to deflate. Let them bake undisturbed for 20 to 25 minutes. You’ll know they’re done when they turn golden brown and feel light when gently lifted.
Still, you’re not quite finished. To keep the interior dry and prevent sogginess, turn the oven off and crack the door open slightly. Let the puffs sit for another 10 minutes in the residual heat. This step helps set the structure and gives you that crisp shell that’s perfect for filling.
Once they’re out of the oven, transfer them to a wire rack to cool completely. Only then should you think about slicing or filling—never while they’re hot, or they’ll collapse.
At this point in the cream puffs recipe, you’ve got beautifully puffed pastries that are crisp on the outside, hollow on the inside, and ready to be filled with delicious cream.
Making the Perfect Pastry Cream
How to Temper Egg Yolks Without Scrambling
Every unforgettable cream puffs recipe has one thing in common: an indulgent, ultra-smooth pastry cream. This filling is what gives cream puffs their luxurious bite—and getting it right isn’t hard when you know what to watch for. The most important part? Tempering your eggs.
Start by heating two cups of whole milk with half of the sugar in a medium saucepan over medium heat. Stir occasionally and bring it just to a simmer—not a full boil. While that’s warming up, whisk together the remaining sugar, cornstarch, a pinch of salt, and four large egg yolks in a mixing bowl until the mixture becomes pale and thick.
Now for the critical step—tempering. Slowly drizzle the hot milk into the yolk mixture while whisking constantly. This gradual increase in temperature prevents the eggs from scrambling, which would ruin the texture. Once you’ve added about half of the milk, you can pour everything back into the saucepan.
This careful process ensures the custard will be silky and lump-free, perfect for piping into your delicate pastry shells.
Stirring to the Right Consistency and Flavor
Once the tempered mixture is back in the saucepan, return it to medium heat and whisk non-stop. This is the point where the pastry cream thickens—usually in just a few minutes.
Keep a close eye on it; the moment it starts to bubble, lower the heat and continue whisking for another 30 seconds to a minute to fully activate the cornstarch.
When the cream reaches a smooth, pudding-like consistency, remove it from the heat and stir in two teaspoons of vanilla extract and two tablespoons of butter. The vanilla gives it that deep, dessert-shop flavor, while the butter finishes the texture with a silky finish.
Pour the cream into a bowl, then press a piece of plastic wrap directly onto the surface. This keeps a skin from forming while it chills. Let it cool to room temperature, then refrigerate it until completely cold—about two hours.
Once chilled, give it a gentle stir before using. The result? A thick, creamy filling that pipes beautifully and holds up inside your puffs without being too stiff or runny.
At this point, your cream puffs recipe is more than halfway complete. You’ve got perfect choux shells and a rich, flavorful pastry cream just waiting to come together.
Filling and Assembling the Cream Puffs
When and How to Fill the Puffs
You’ve made it through the tricky parts of this cream puffs recipe—the choux shells are golden and hollow, the pastry cream is chilled and silky. Now it’s time for the most satisfying step: filling them.
But timing matters. Never fill cream puffs while the pastry is still warm. Warm puffs can cause the cream to melt or break down, turning your perfect filling into a runny mess. So, let the puffs cool completely on a wire rack before moving forward.
Once they’re cool, grab a sharp serrated knife and carefully cut each puff in half horizontally. You’ll notice a hollow space inside, which is exactly what we want—just enough room to hold that delicious cream.
Use a clean piping bag fitted with a round or star tip to pipe the pastry cream into the bottom half of each puff. Start from the center and fill until the cream is slightly mounded. If you don’t have a piping bag, a small spoon will do just fine, but piping creates a cleaner and more elegant presentation.
Top each filled puff with the upper half, pressing gently to seal.
Tips for a Clean, Creamy Finish
Presentation counts. A few small touches can turn your cream puffs from homemade to bakery-worthy.
First, always clean your piping tip between puffs to avoid mess and keep things uniform. Work with cold pastry cream—it holds its shape better and is easier to pipe. If it’s too stiff after chilling, give it a quick whisk before filling.
Once assembled, you can dust the tops lightly with powdered sugar for a classic finish. Want to go fancier? Dip the tops in a chocolate glaze or drizzle with melted white chocolate for extra flair.
Another pro tip: Fill only the puffs you plan to serve immediately. While the shells can be stored, filled cream puffs are best enjoyed within a few hours. The longer they sit, the more the pastry softens.
Now that your cream puffs recipe has come together, you’re just one step away from serving these beauties in style.
Best Ways to Store and Preserve Freshness
Even the best cream puffs recipe can fall short if the pastries are soggy or stale. That’s why knowing how to store them properly is just as important as baking them right.
Unfilled cream puffs can be made ahead and stored at room temperature in an airtight container for up to one day. This is especially helpful if you’re prepping for a party or gathering. Want to keep them longer? Freeze them. Once they’re completely cool, place them in a single layer on a baking sheet and freeze until solid. Then, transfer them to a freezer-safe bag. They’ll stay fresh for up to two months.
To use frozen puffs, let them thaw at room temperature for about 15–20 minutes. If you want to bring back that slight crispness, pop them in a 300°F (150°C) oven for 5 minutes before filling.
If the puffs are already filled, things change. Because of the dairy-rich cream, filled cream puffs must be kept in the fridge. Store them in a sealed container and enjoy within 24 hours for the best texture and flavor.
Can You Freeze Cream Puffs? How to Reheat Them Right
Yes, you can freeze both the shells and the assembled puffs—just not in the same way.
For best results, freeze unfilled shells. They handle freezing well and maintain their shape and texture after reheating. To reheat, preheat your oven to 300°F and bake the thawed shells for about 5 minutes. Let them cool before adding the filling.
Freezing filled cream puffs is possible but not ideal. The texture of the cream may change slightly, and the shells can become softer. If you need to do it, freeze them on a tray uncovered, then wrap individually and store in an airtight container. Thaw them in the fridge overnight—never at room temperature, or the cream could spoil.
No matter how you serve or store them, cream puffs are best when enjoyed fresh. But with a little care, you can easily make them ahead of time without sacrificing quality.
Fixing Common Cream Puff Mistakes – Why Your Cream Puffs Collapsed or Cracked!
Even with the best cream puffs recipe, things can go wrong. If your puffs deflated, cracked, or didn’t rise, don’t worry—it happens to the best of us. Here’s how to fix (and avoid) the most common issues.
One of the top reasons cream puffs collapse is underbaking. If the shell hasn’t had enough time to fully set, it can’t support itself once out of the oven. Always wait until they’re a deep golden brown and feel light when gently lifted. Don’t rush this step.
Another common mistake? Opening the oven door too early. This causes the hot air and steam—both crucial for puffing—to escape before the pastry sets, leading to flat or sunken puffs. Trust the process and avoid peeking for at least 20 minutes.
If your puffs came out cracked, the culprit is usually dough that’s too dry or piped unevenly. Make sure the dough is smooth and pliable before piping, and always press down peaks with a wet finger to smooth them out.
Salvaging Overbaked or Underfilled Puffs
So, what if you already overbaked your puffs and they’re too hard or dry? All is not lost. Lightly mist the inside with water before reheating in a warm oven for a few minutes to soften them slightly. Then fill and serve—they may not be picture-perfect, but they’ll still taste amazing.
If you underfilled your puffs or the cream has settled, just add a bit more before serving. You can even slice the top off and pipe an extra swirl of pastry cream on top for a beautiful, bakery-style look.
The key takeaway? Practice makes perfect. This cream puffs recipe is forgiving once you understand the basics, and even your “flawed” batches will be delicious.
Frequently Asked Questions
What is the secret to good cream puffs?
Steam. A hot oven, a well-dried dough, and not opening the door during baking are key.
Why did my cream puffs deflate?
Usually from opening the oven too early or underbaking the shells.
What are cream puffs filled with?
Traditionally, they’re filled with pastry cream, but whipped cream or custard are popular too.
Can cream puffs be made ahead of time?
Yes. Bake the shells ahead and fill them just before serving.
How long do cream puffs last?
Unfilled: up to 2 days in an airtight container. Filled: best within 24 hours.
Do cream puffs need to be refrigerated?
Only after filling. Keep them chilled to protect the cream.
Conclusion
Now that you’ve mastered this cream puffs recipe, you’re ready to turn your kitchen into your own personal French bakery. From the airy choux shells to the rich vanilla pastry cream, every step brings you closer to a dessert that feels like a little celebration in every bite.
Whether you’re baking for a family gathering, impressing guests, or simply treating yourself, these cream puffs offer the perfect balance of ease and elegance. Follow the tips, avoid the common mistakes, and you’ll be making batches like a pro in no time.
Print
Mom’s Famous Cream Puffs Recipe (Best Homemade Guide)
- Total Time: 50 minutes
- Yield: 12 cream puffs 1x
- Diet: Vegetarian
Description
Light, golden cream puffs with a rich, velvety pastry cream filling—this classic treat is pure nostalgic delight.
Ingredients
Choux Pastry
1 cup water
1/2 cup unsalted butter
1/4 teaspoon salt
1 cup all-purpose flour
4 large eggs
Pastry Cream Filling
2 cups whole milk
1/2 cup granulated sugar
1/4 cup cornstarch
1/4 teaspoon salt
4 large egg yolks
2 teaspoons vanilla extract
2 tablespoons unsalted butter
Instructions
1. Preheat your oven to 400°F (200°C) and line a baking sheet with parchment paper.
2. Combine water, butter, and salt in a saucepan; bring to a boil.
3. Remove from heat; stir in flour until the dough pulls from the sides.
4. Return to heat; stir for 2 minutes to dry slightly.
5. Cool slightly, then beat in eggs one at a time until glossy.
6. Pipe 1½-inch mounds on the sheet; smooth peaks with a wet finger.
7. Bake for 20–25 minutes until golden and light; then leave in the turned-off oven ajar for 10 minutes.
8. Cool puffs on a rack.
9. Heat milk and half the sugar; whisk yolks with remaining sugar, cornstarch, and salt.
10. Temper yolks with hot milk; return mixture to the pan and cook until thick.
11. Off heat, stir in vanilla and butter; chill with plastic wrap on surface.
12. Slice cooled puffs; fill with pastry cream and replace tops.
13. Dust with powdered sugar and serve immediately.
Notes
Don’t open the oven door early—puffs can collapse.
Pastry cream can be made a day ahead.
Use a star tip for a fancy fill.
- Prep Time: 20 minutes
- Cook Time: 30 minutes
- Category: Dessert
- Method: Baking
- Cuisine: French-American
Nutrition
- Serving Size: 1 cream puff
- Calories: 210
- Sugar: 10g
- Sodium: 85mg
- Fat: 14g
- Saturated Fat: 8g
- Unsaturated Fat: 5g
- Trans Fat: 0g
- Carbohydrates: 18g
- Fiber: 0.5g
- Protein: 4g
- Cholesterol: 105mg
Keywords: cream puffs, choux pastry, pastry cream